Warm Up to Red Velvet Brownies: A Cozy Delight
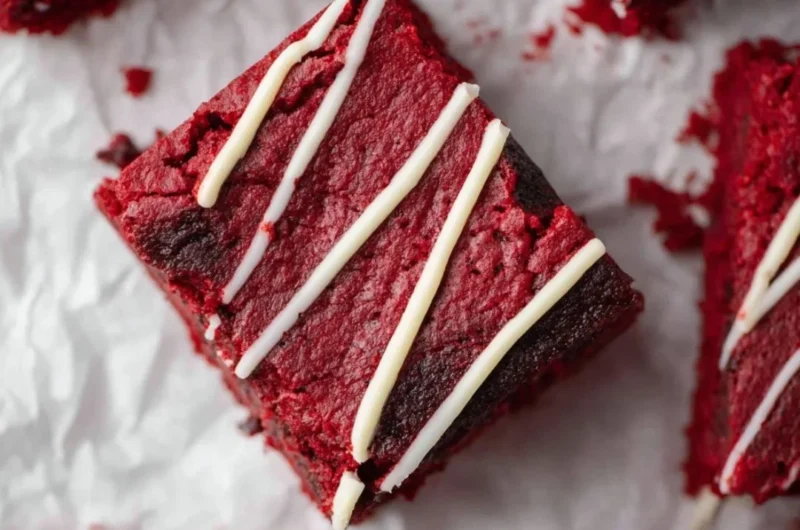
There’s something incredibly heartwarming about a tray of freshly baked Red Velvet Brownies cooling on the kitchen counter. The rich, velvety color, mingled with that unmistakable hint of cocoa and chocolate, is enough to make anyone feel instantly cozy. I remember the first time I discovered a recipe for these delightful treats. It was a rainy afternoon, with soft music playing in the background, and the comforting aroma of baking wafting through the air. It felt like a gentle embrace, wrapping me in nostalgia and bliss.
These Red Velvet Brownies aren’t just a dessert; they’re a memory in the making—a perfect way to celebrate life’s little moments. They’re an easy weeknight dessert that’s bound to impress your friends and family. Trust me, this is one you’ll definitely want to pin for later!
Why You’ll Love This Recipe
- Irresistibly Moist and Fudgy: These brownies boast a gooey texture that melts in your mouth, making them a comforting indulgence.
- Simple Ingredients: With pantry staples and minimal fuss, these can easily become your go-to dessert for any occasion.
- Stunning Presentation: The vibrant red color makes these brownies a feast for the eyes—perfect for festive gatherings or cozy evenings.
- Easily Customizable: Whether you add rich white chocolate chips or top them with a luscious drizzle, you can personalize these brownies to suit your taste.
- Perfect for Sharing: Great for parties, potlucks, or simply enjoying with loved ones, they’re a guaranteed crowd-pleaser.
What You’ll Need
Gather These Simple Ingredients:
- 3/4 cup unsalted butter (melted)
- 2 oz chopped semi-sweet chocolate bar
- 1 & 1/4 cup granulated sugar
- 2 large eggs
- 2 teaspoon vanilla extract
- 1 teaspoon white vinegar
- 1/2 tablespoon red gel food coloring
- 2 tablespoons unsweetened cocoa powder
- 1 & 1/4 cup all-purpose flour
- 1/4 teaspoon salt
- 1/2 cup white chocolate chips (optional; mix in the batter or melt for drizzling on top)
Let’s Make It Together
- Preheat your oven to 350°F and line an 8×8 inch baking pan with parchment paper.
- In a large microwave-safe mixing bowl, melt the butter and chopped chocolate in the microwave in 30-second increments. Stir until fully melted and creamy.
- Add in the granulated sugar and mix until combined. Then, add in the eggs one at a time, beating well after each addition to create that lovely, smooth texture.
- Stir in the vanilla extract, white vinegar, and red food coloring, which brings that enchanting color to life.
- In a separate bowl, sift together the cocoa powder, flour, and salt. This helps to ensure a light and fluffy texture.
- Gradually add the dry ingredients to the wet ingredients, mixing until just combined. Be careful not to overmix—this is the secret to those fudgy brownies!
- If you desire a little extra sweetness, gently fold in the white chocolate chips into the brownie batter.
- Pour the batter into the prepared 8×8 inch pan and spread it evenly for an even bake.
- Bake in the preheated oven for approximately 30-35 minutes. Use a toothpick inserted in the center to check; it should come out with a few moist crumbs—not wet batter!
- Allow the brownies to cool completely in the pan before cutting into delightful squares.
- If you’re feeling indulgent, melt some white chocolate and drizzle it on top once cooled. Allow to set, slice, and enjoy!
Delicious Variations to Try
- Nutty Crunch: Add chopped walnuts or pecans for a lovely crunch that complements the soft brownie.
- Minty Fresh: Incorporate a few drops of peppermint extract for a refreshing twist that pairs wonderfully with chocolate.
- Cheesecake Swirl: Create a creamy, indulgent layer by swirling in a simple cheesecake mixture before baking.
- Fruity Surprise: Toss in some raspberries or strawberries for a tangy contrast to the rich chocolate flavor.
Chef Emma’s Helpful Tips
- Make-Ahead Magic: These brownies can be made a day in advance. Just store them in an airtight container; they’ll taste even better the next day!
- Slicing Secrets: For clean slices, use a sharp knife dipped in hot water. Wipe it between cuts for perfectly even squares.
- Ingredient Substitutions: If you’re out of unsalted butter, feel free to use salted butter, just reduce the added salt slightly.
- Storage Suggestions: Keep your brownies in a sealed container at room temperature for up to 4 days or refrigerate for a longer shelf life.
What’s Inside – Nutrition Breakdown
- Serving Size: 1 brownie (based on 16 servings)
- Calories: 150
- Carbohydrates: 19g
- Sugar: 12g
- Fat: 7g
- Protein: 2g
- Sodium: 25mg
Frequently Asked Questions
Can I make this ahead?
Absolutely! These brownies are perfect for making a day in advance. They only get better as they sit!
Can I use different ingredients?
Yes! Feel free to customize with different types of chocolate or even swap out the food coloring for a different hue.
How do I store leftovers?
Store in an airtight container at room temperature for about 4 days or refrigerate for up to a week.
How long does it last?
If properly stored, these delightful brownies can last for up to a week in the fridge!
A Cozy Closing Note
There you have it—my scrumptious Red Velvet Brownies that promise to bring warmth and joy to your home. They encapsulate the essence of comfort food while allowing for a splash of creativity with each bite. Whether you’re celebrating a special occasion or just embracing the sweetness of an ordinary day, these brownies are sure to lift your spirits.
Save this Red Velvet Brownies recipe to your dessert board so it’s ready when you need a cozy treat! Happy baking!